START IN THE STAFF PANEL
Open your display settings.
On a Pi configured with the production kiosk guide, open http://<pi-ip-address>/admin — no port needed. For a local Windows, Linux or macOS install, use http://<your-server-ip>:5000/admin. Sign in with your staff account, then choose Settings > Customisation. This is the ORBPuzzles app’s login — you don’t need an account on this website.
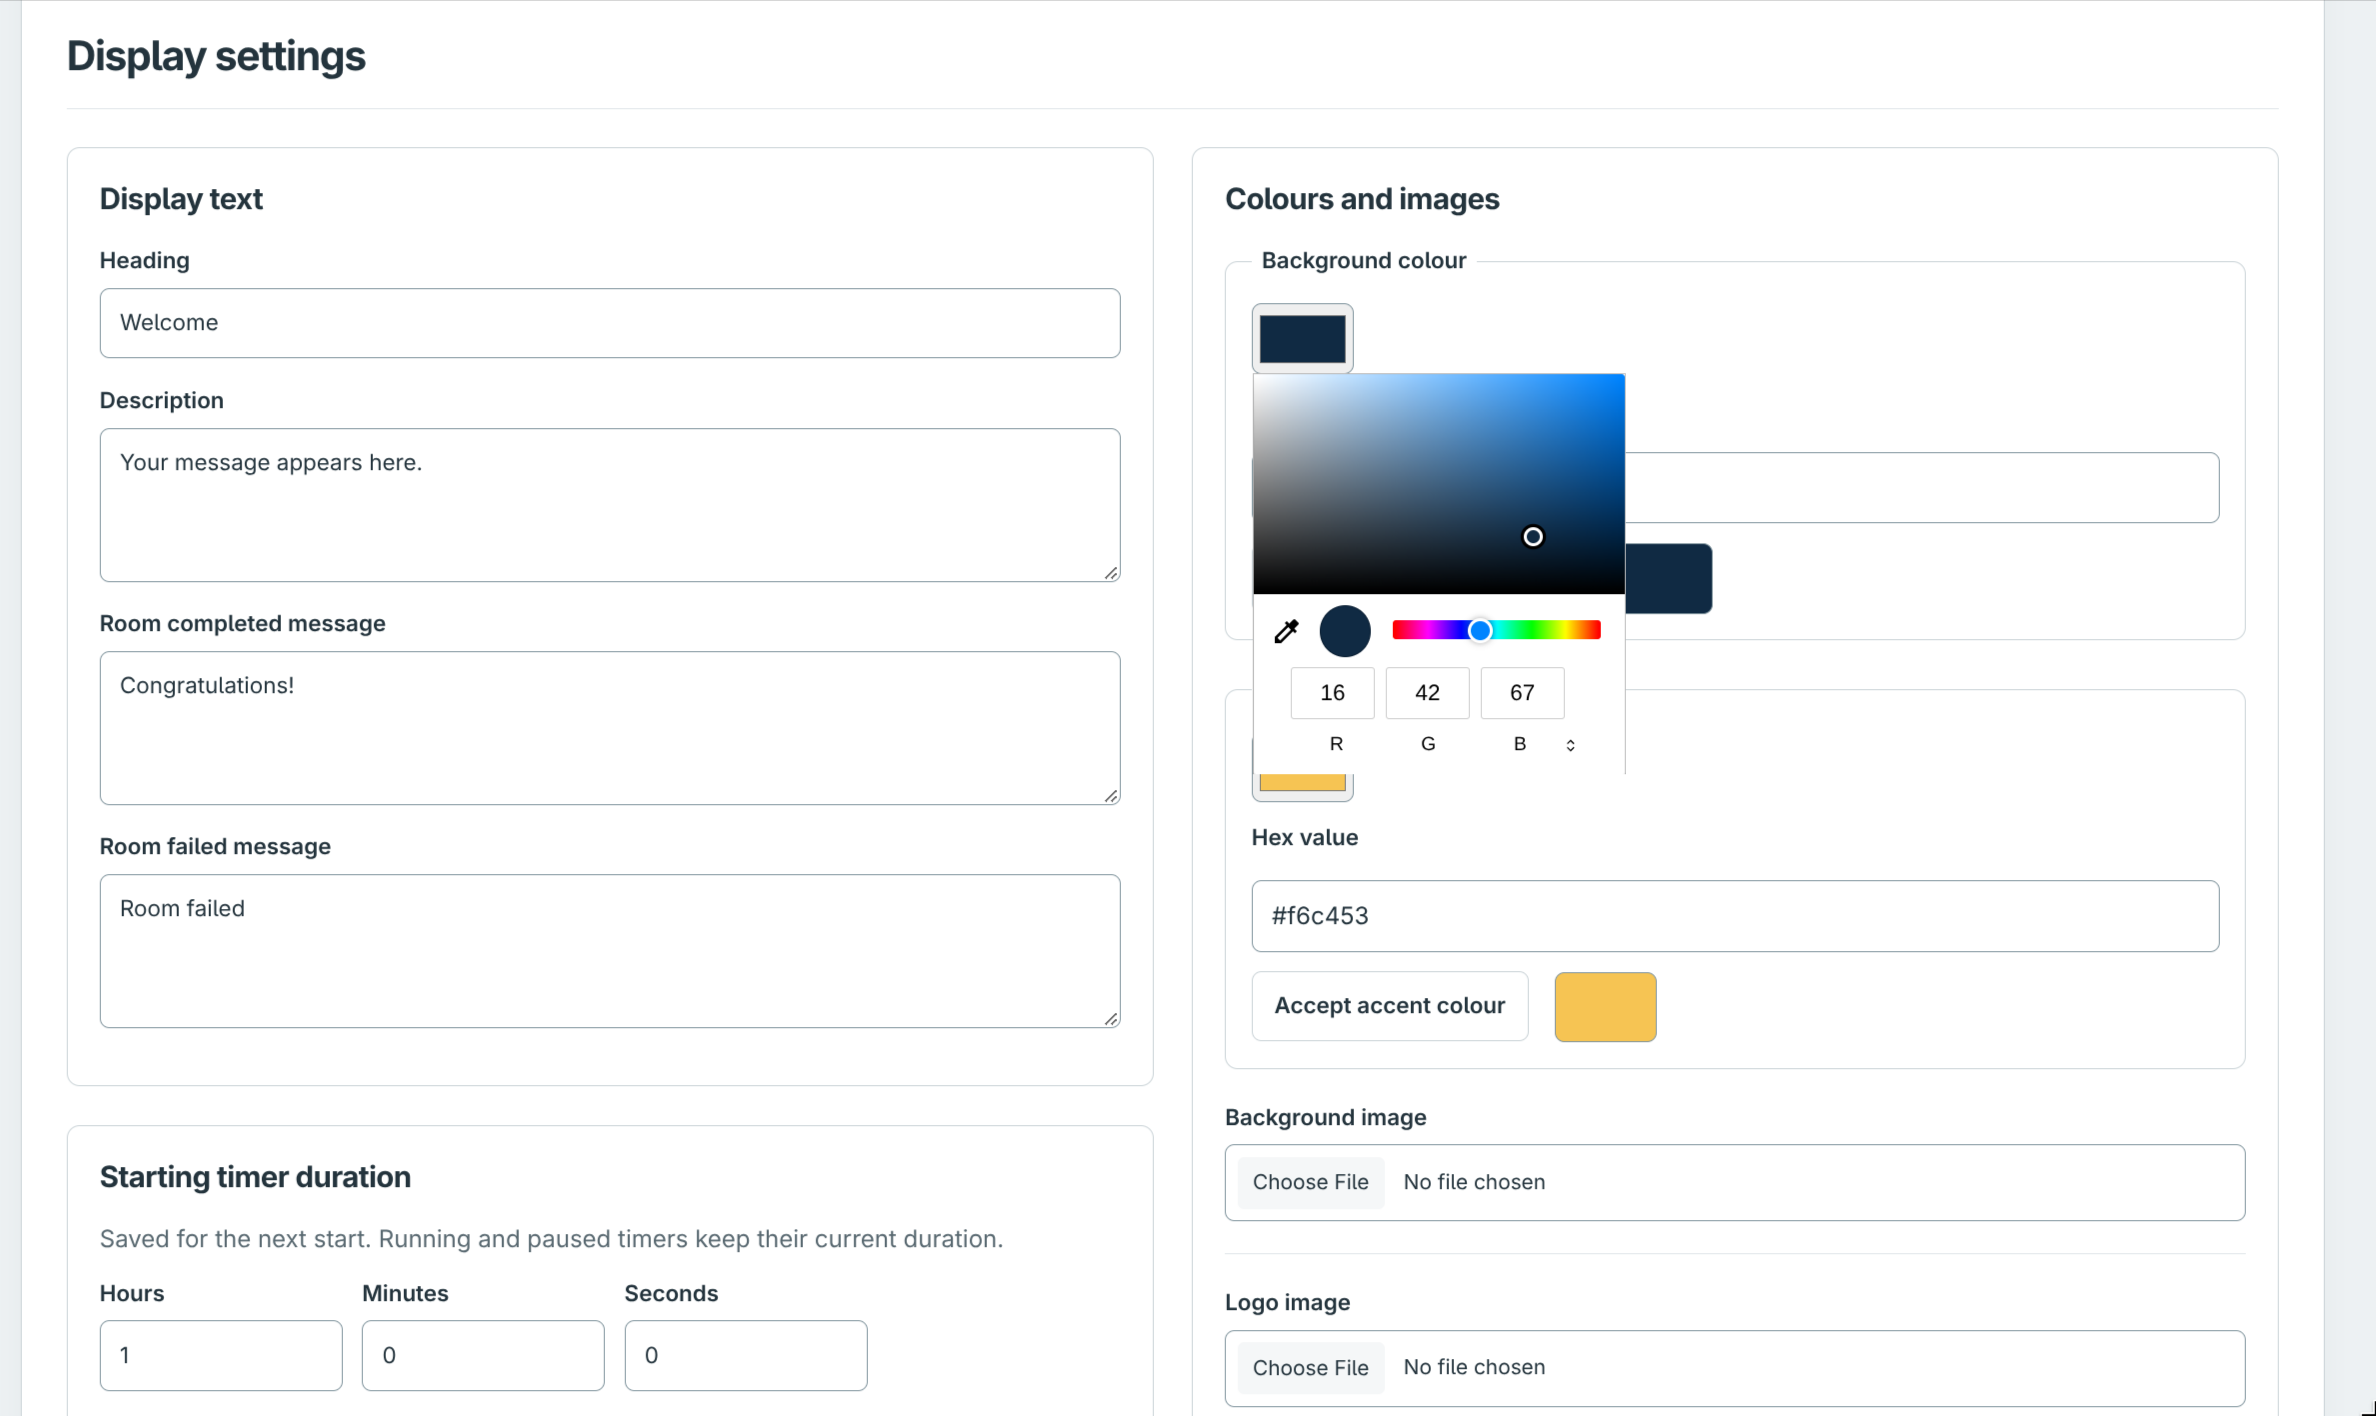
The screenshot shows a colour picker open. The game screen and this settings page are separate views: players see the display, not the staff controls.
Write the room’s voice.
Heading
The main game-screen title. Replace “Welcome” with your room name or a short in-world briefing title.
Description
The normal message on the display. Set a short welcome, objective or atmospheric line that the whole team can read.
Room completed message
The message shown when the room is marked complete. Make the success moment fit your story.
Room failed message
The message shown for a failed run. Set an ending that matches the room without relying on a staff explanation.
Short headings and concise messages work better than paragraphs. Check the real screen from the players’ position, not just on your laptop.
Set the mood in colour.
Use Background colour for the base screen colour and Accent colour for highlighted elements such as the heading and timer.
Pick a colour with the colour swatch or enter its Hex value, such as #102a43 for a dark navy background and #f6c453 for a warm yellow accent. Confirm the fields with Accept background colour and Accept accent colour, then save the display settings.
Prioritise contrast over matching every brand colour. A countdown must remain readable as lighting changes and as the timer enters its warning states.
Bring your artwork into the room.
Use Background image for your game-screen artwork and Logo image for your room or venue mark. Choose files from your computer and check their previews before saving.
The app accepts PNG, JPEG, GIF and WebP images. Use artwork you own or have permission to use. A transparent PNG or WebP is useful for a logo; a quieter background makes text and hints easier to read.
Preview your artwork on the actual display resolution. Keep important details away from the timer and text areas; do not assume a laptop preview shows every crop or edge exactly as the kiosk will.
Choose the next run’s duration.
Under Starting timer duration, set Hours, Minutes and Seconds. For a one-hour game, enter 1 / 0 / 0. For a 45-minute game, enter 0 / 45 / 0.
The duration must be at least 1 second; minutes and seconds must each be between 0 and 59. Save the settings to store the new starting duration.
The saved duration is for the next start. A running, paused or finished session keeps its captured duration. Resetting shows the saved duration for the next run. Use the admin panel’s time-adjustment controls when you intentionally need to alter the current session.
Save it. See it.
Click Save display settings. Open Open live preview from the staff navigation, or open the display on the same trusted network: http://<pi-ip-address>/ for the Pi kiosk setup, or http://<your-server-ip>:5000/ for a local install.
Display changes are stored locally and pushed to the game screen. The admin interface’s Dark mode option only changes the staff pages — it does not recolour the players’ game screen.
Use the room controls to test complete and failed states without a team present. For custom audio, save files under Settings > Sounds; those are separate from display customisation. Without a custom event file, the app uses a built-in tone. Test audio on the main player page: the embedded live preview is deliberately silent. See the illustrated guides to live preview and event sounds.
READY FOR THE NEXT TEAM
Check the whole experience.
- The heading and description fit and remain readable from across the room.
- The timer, hints and result messages have clear contrast against the background.
- The background and logo display correctly at your screen’s resolution.
- The next-run duration is correct after a reset.
- Complete and failed messages work, and the display receives live updates.
- Back up
src/instance/before replacing the application checkout to preserve settings and uploaded assets.
Make it unmistakably yours.
Once the look is right, test a full run on the actual room display before opening to players.
Back to install & help ↗