START BEHIND THE SCENES
One staff panel.
A whole session.
On a Pi configured with the production kiosk guide, open http://<pi-ip-address>/admin without a port. For a local Windows, Linux or macOS install, open http://<your-server-ip>:5000/admin. Use your trusted room network and sign in with your staff account. Start with the room reset, the correct starting duration, and the connected display visible.
The browser display, hints, event sounds, live preview and recorded statistics work on all supported platforms. Physical GPIO and Pi HDMI-power controls require suitable Raspberry Pi hardware and drivers. These website screenshots are static examples; they don’t control your installed app.
Pause timer controls the countdown. Pause room interaction in Admin and Pause GPIO events on the GPIO page control the same GPIO pause state: mapped physical inputs are ignored while paused. This does not pause the timer, turn off an active output or remove hardware power. Pausing software is not an electrical isolation or emergency-stop mechanism.
Prepare your hints once.
Open Settings > Hint library, or use Manage saved hints from the admin panel. A preset saves a clue so you can send it at the right moment without typing it again.
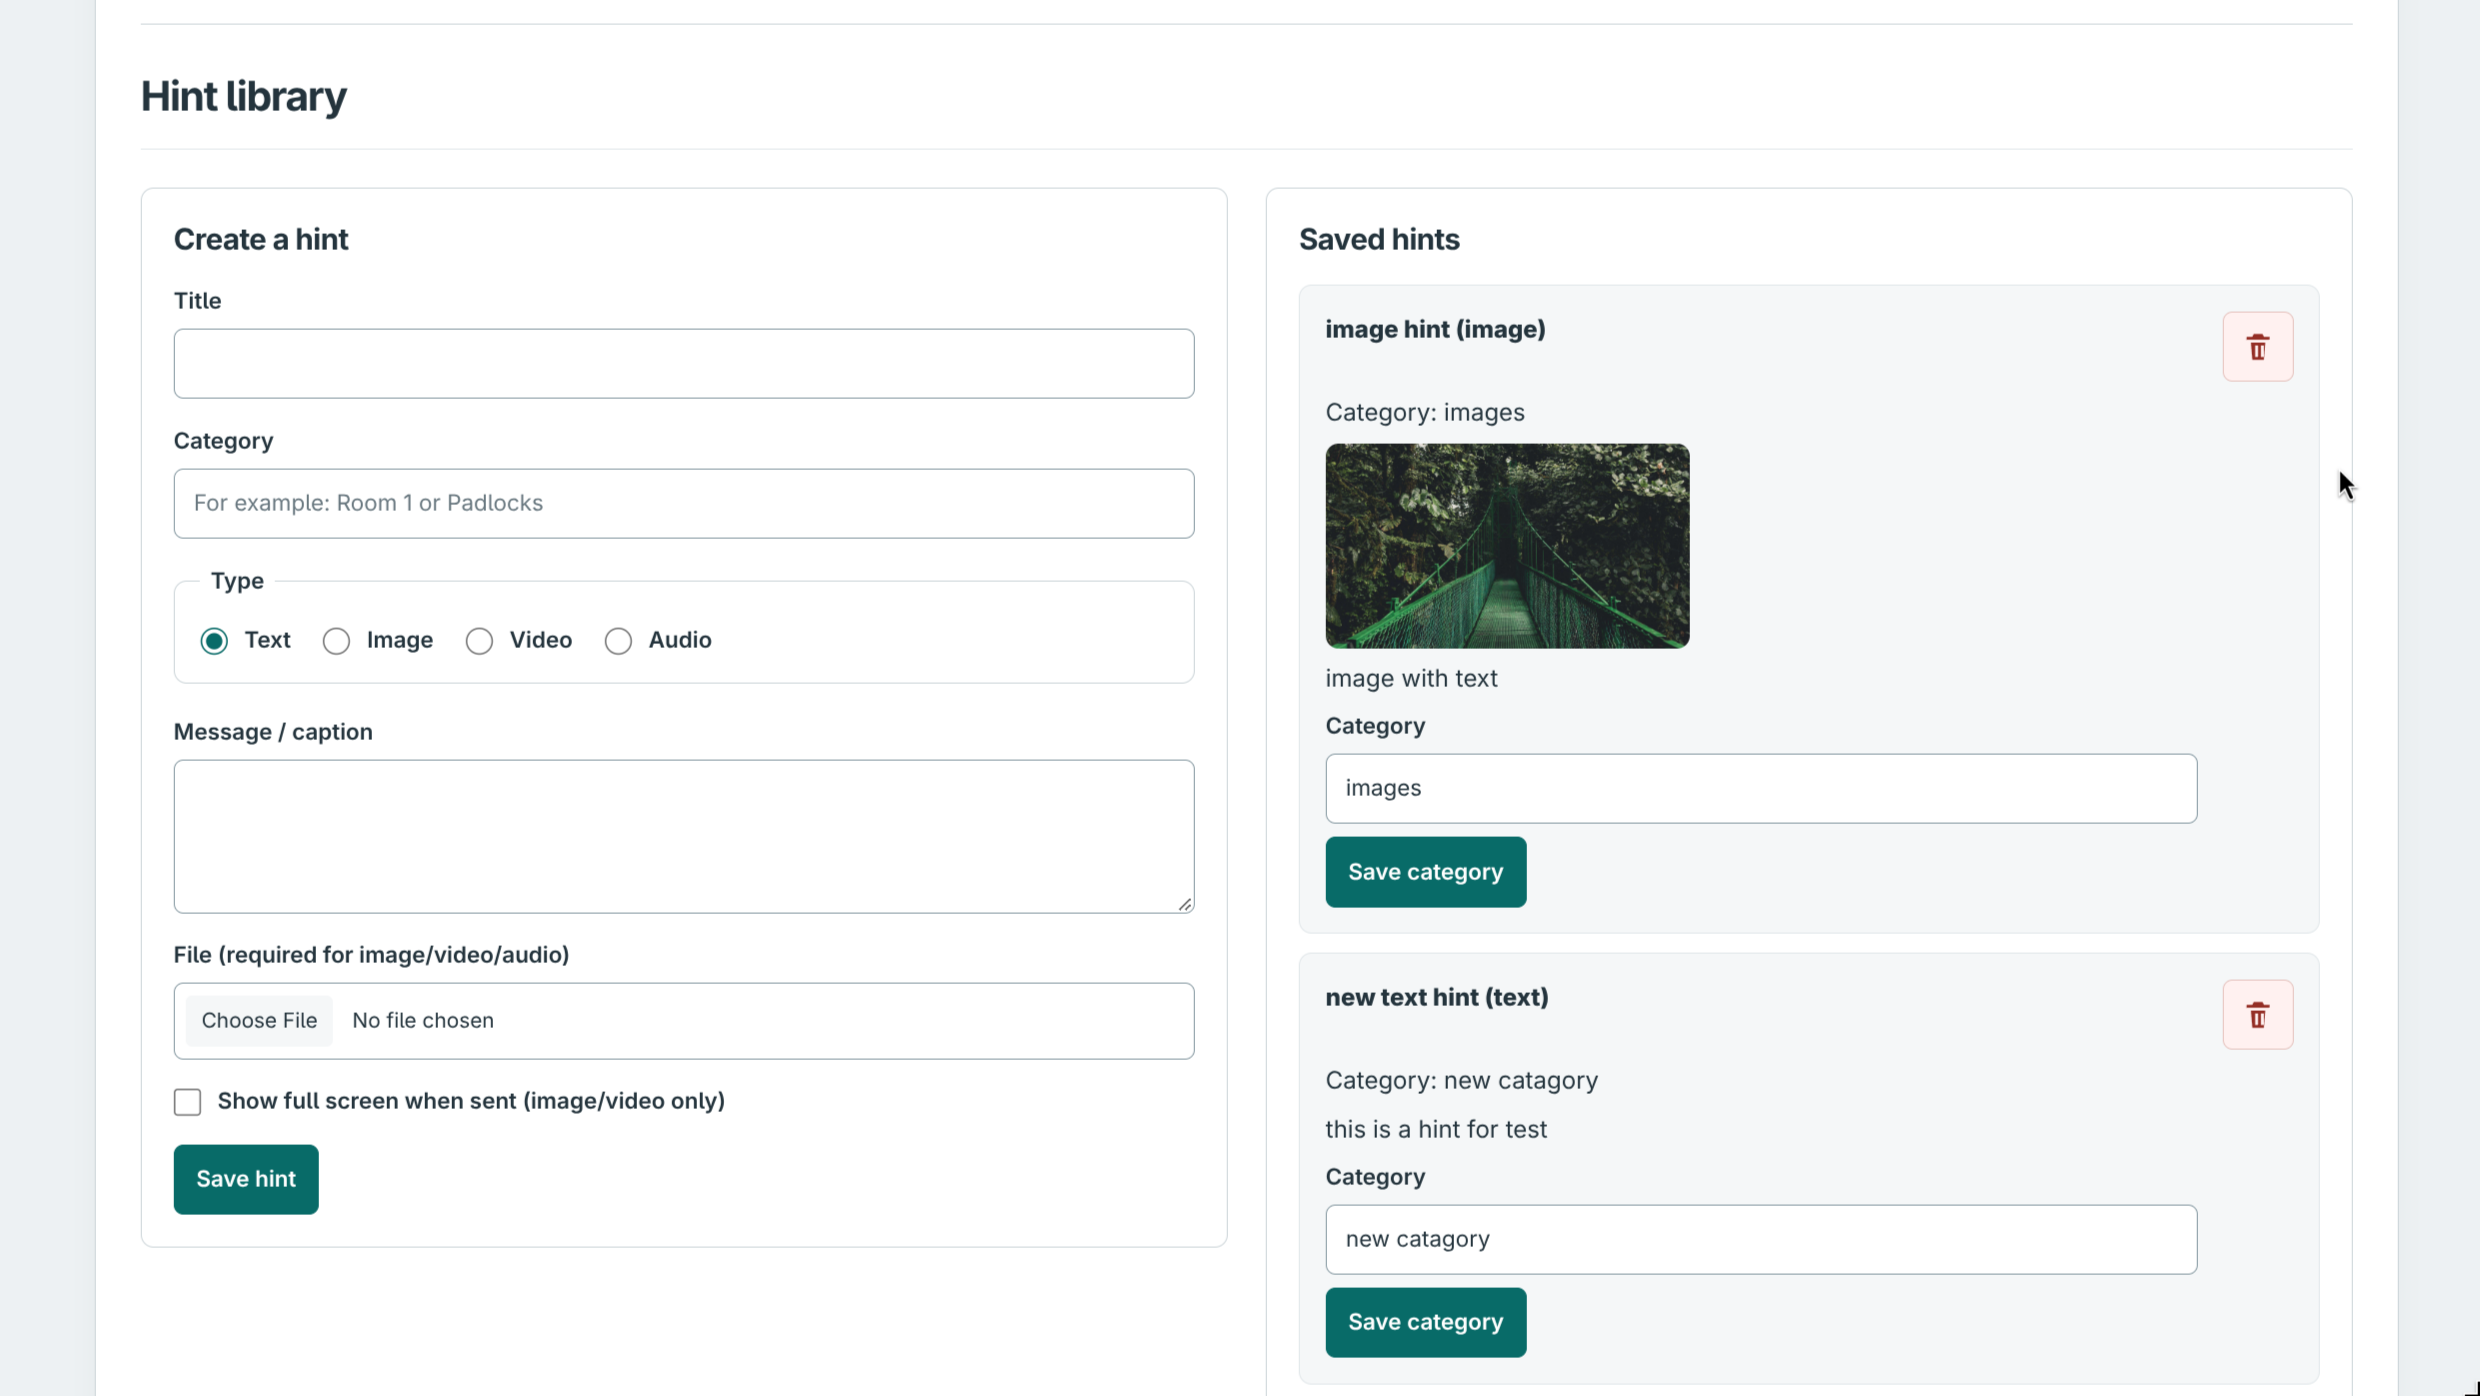
- Add a recognisable Title and an optional Category, such as a puzzle name or “Padlocks”. Categories make the library easier to filter.
- Choose Text, Image, Video or Audio. Enter the Message / caption; image, video and audio hints also need a file.
- For image or video clues, optionally select Show full screen when sent. This option is not for text or audio presets.
- Click Save hint. Existing presets can be regrouped with Save category; the delete control removes the preset.
- Back in Admin, use Search saved hints and the category filter, select a saved hint, then choose Send saved hint.
Text, image, video and audio presets use the app’s two-minute announcement window. The normal screen returns when it expires; test longer media against that window before using it in a game. For a one-off clue, type into Two-minute announcement and choose Send for 2 minutes.
Which media files can I use?
Images: PNG, JPEG, GIF or WebP. Videos: MP4, WebM or MOV. Audio: MP3, WAV, OGG, M4A or AAC. Accepted file extensions don’t guarantee that every codec plays in every browser; test the actual kiosk. Use media you own or have permission to use.
Give each event its sound.
Choose Settings > Sounds to open Event sounds. Upload separate files for Notification sound, Room completed sound and Room failed sound, then click Save sounds.
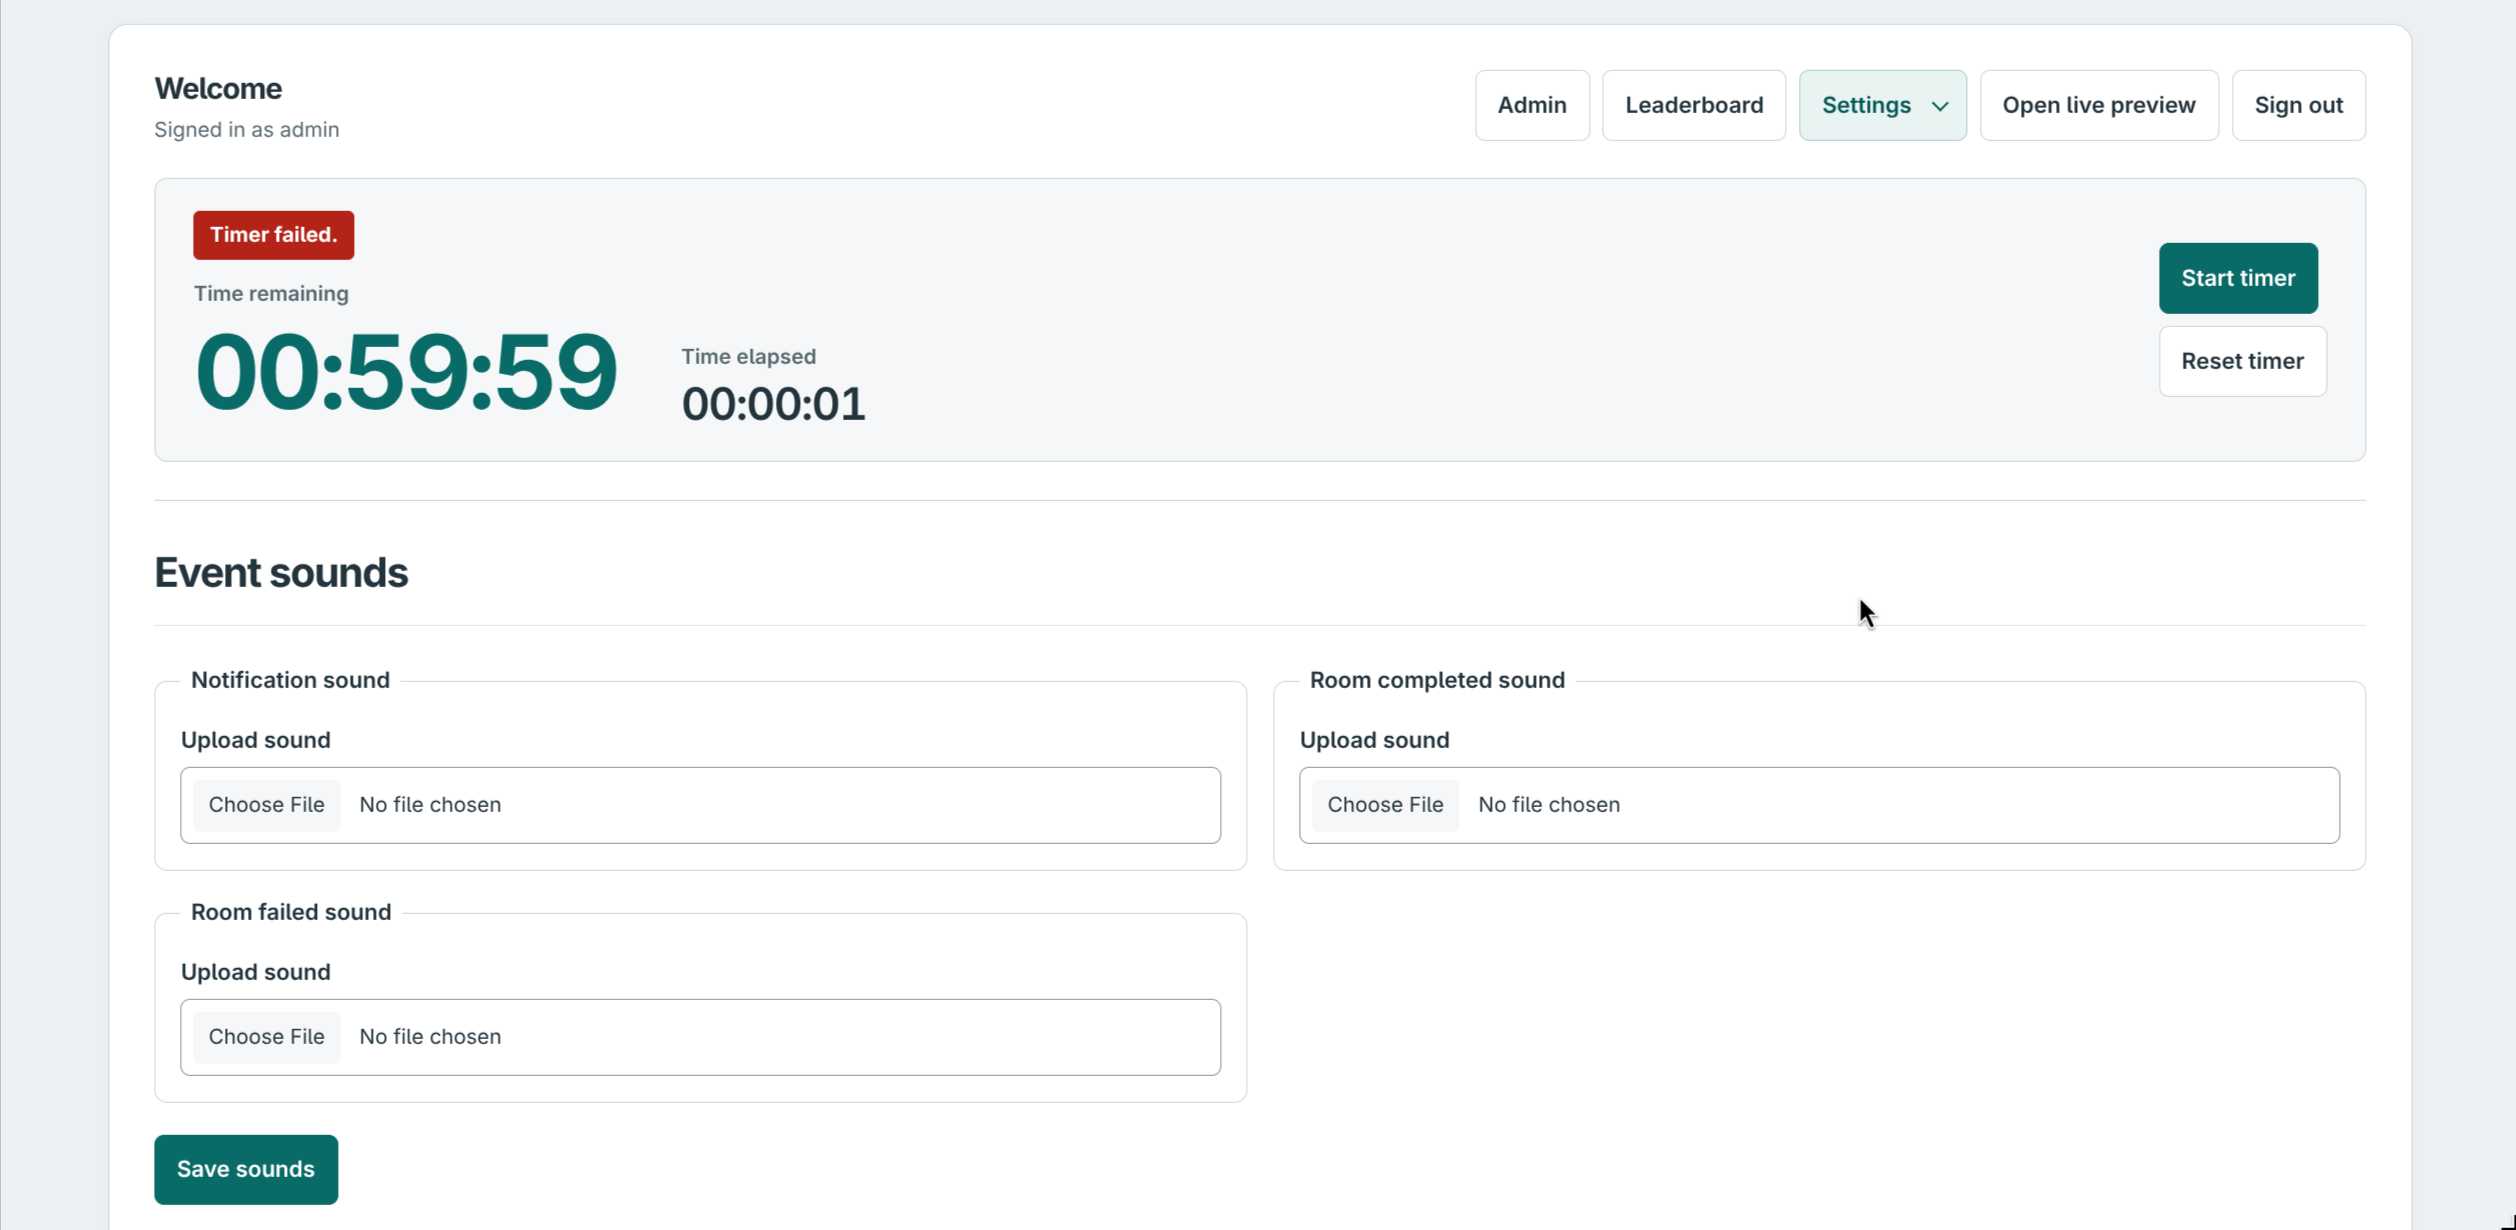
Event sounds provide audio cues for game events. They are separate from audio hint presets, which you prepare and send from the hint library. Without a custom event file, the app uses a built-in tone. Supported event-sound extensions are MP3, WAV, OGG, M4A and AAC; browser codec support still matters.
Check the real display’s speakers, volume and HDMI output. The embedded live preview is deliberately silent; use the main player display for sound checks. Desktop browser autoplay rules may require an initial interaction. The Pi kiosk guide enables Chromium autoplay and explains HDMI audio-device checks. A successful upload does not prove the room speakers can play the file.
Bring physical events into the game.
Choose Settings > GPIO. This page separates input events — a puzzle or switch tells the app something — from output triggers, where a staff button changes a configured GPIO signal.
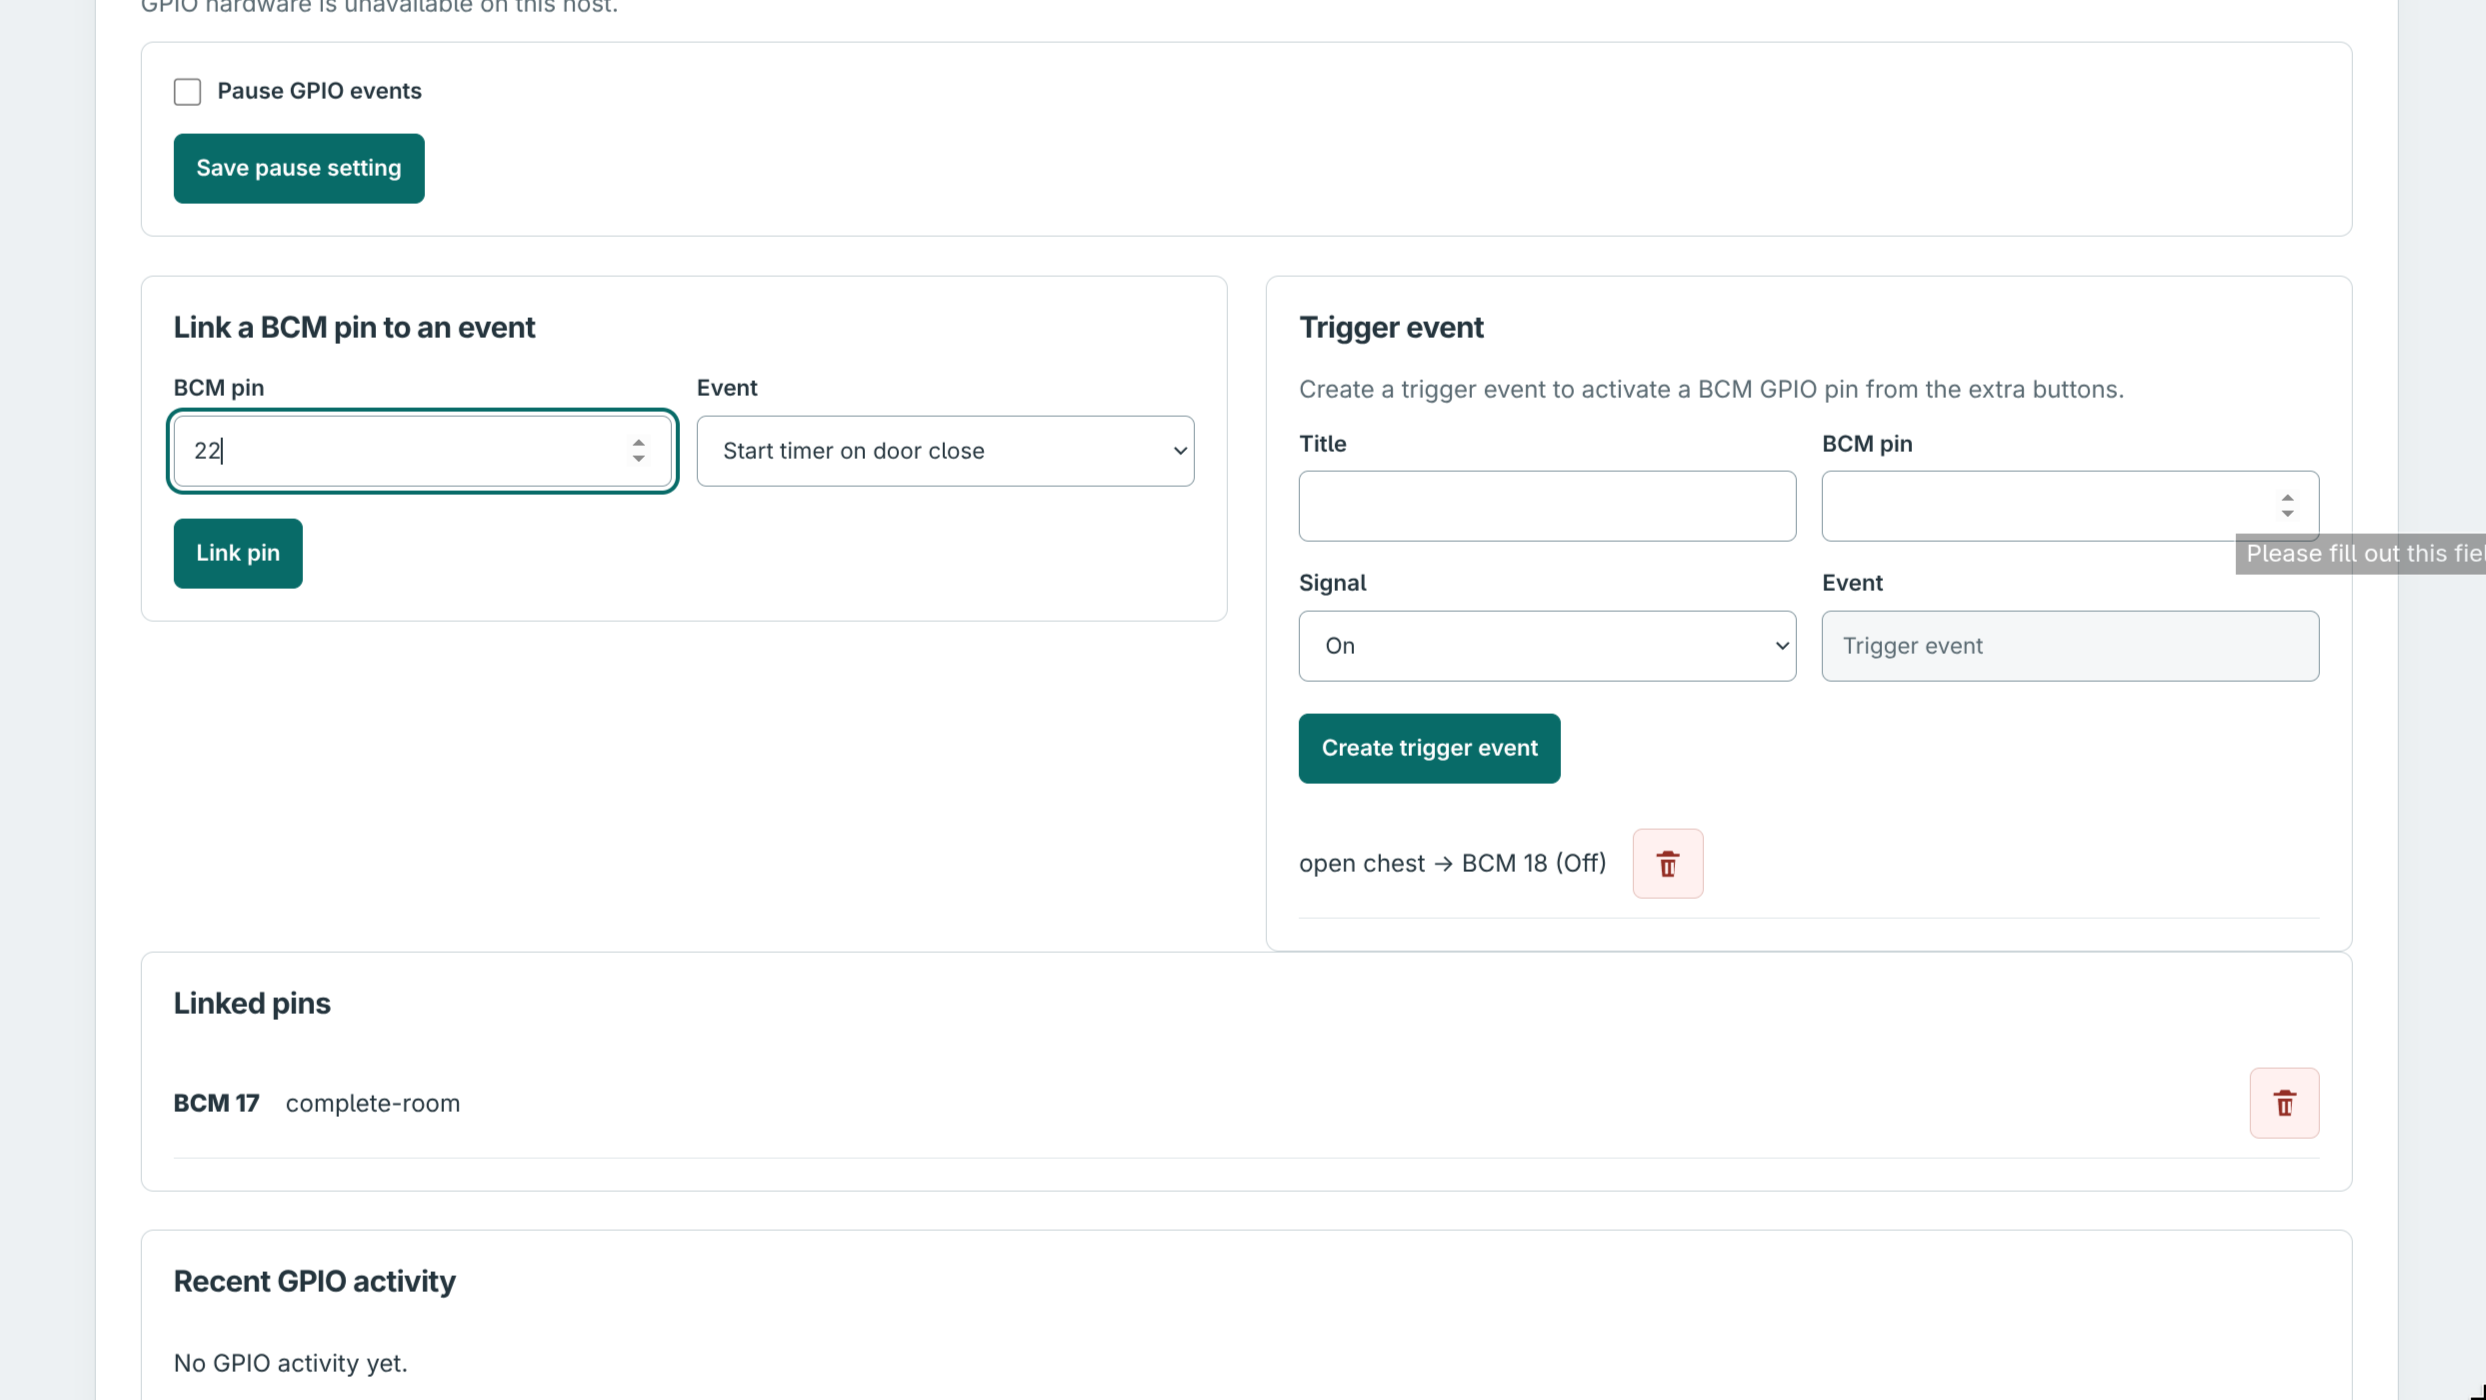
The screenshot was taken on a non-Pi host, so GPIO hardware is unavailable on this host is expected. It also shows an incomplete trigger form’s browser validation message. Neither means a physical device has been activated.
Link an input to an event
Under Link a BCM pin to an event, enter an unused BCM input number, choose the event, then click Link pin. Available events include Complete room, Start timer on door close, Toggle HDMI display power and Send hint preset. The preset event also needs a saved hint selection.
For a simple normally-open button, use the input wiring in the GPIO pin guide. A door-close event needs a suitable contact/interface whose active state matches closing the door; the menu label alone does not make an arbitrary sensor electrically compatible.
Pause and inspect input activity
Check Pause GPIO events and click Save pause setting before testing mapped inputs without triggering their game events. Review Linked pins and Recent GPIO activity: accepted events are recorded as triggered, and paused or rejected inputs are recorded as ignored. Unpause intentionally before the next team.
Create an output trigger
Under Trigger event, set a recognisable Title, a different unused BCM pin and Signal (On or Off), then choose Create trigger event. The action appears under Extra buttons in the staff controls. This sets an output state, not a timed pulse; plan how to restore the intended state.
The example’s BCM 18 may be claimed by audio/PWM on your Pi. Use a verified free pin instead. GPIO is 3.3 V logic only: use a compatible, rated driver or isolated interface and separate load power. Don’t connect a lock, lamp, motor or powered sensor directly, and don’t reuse the same pin as both an input and output. These controls are not a safety-critical door-control design.
Check the players’ view.
Choose Open live preview in the staff navigation. The Live home screen preview dialog shows the current game display without navigating away from the admin panel. Use Close to return to the controls.
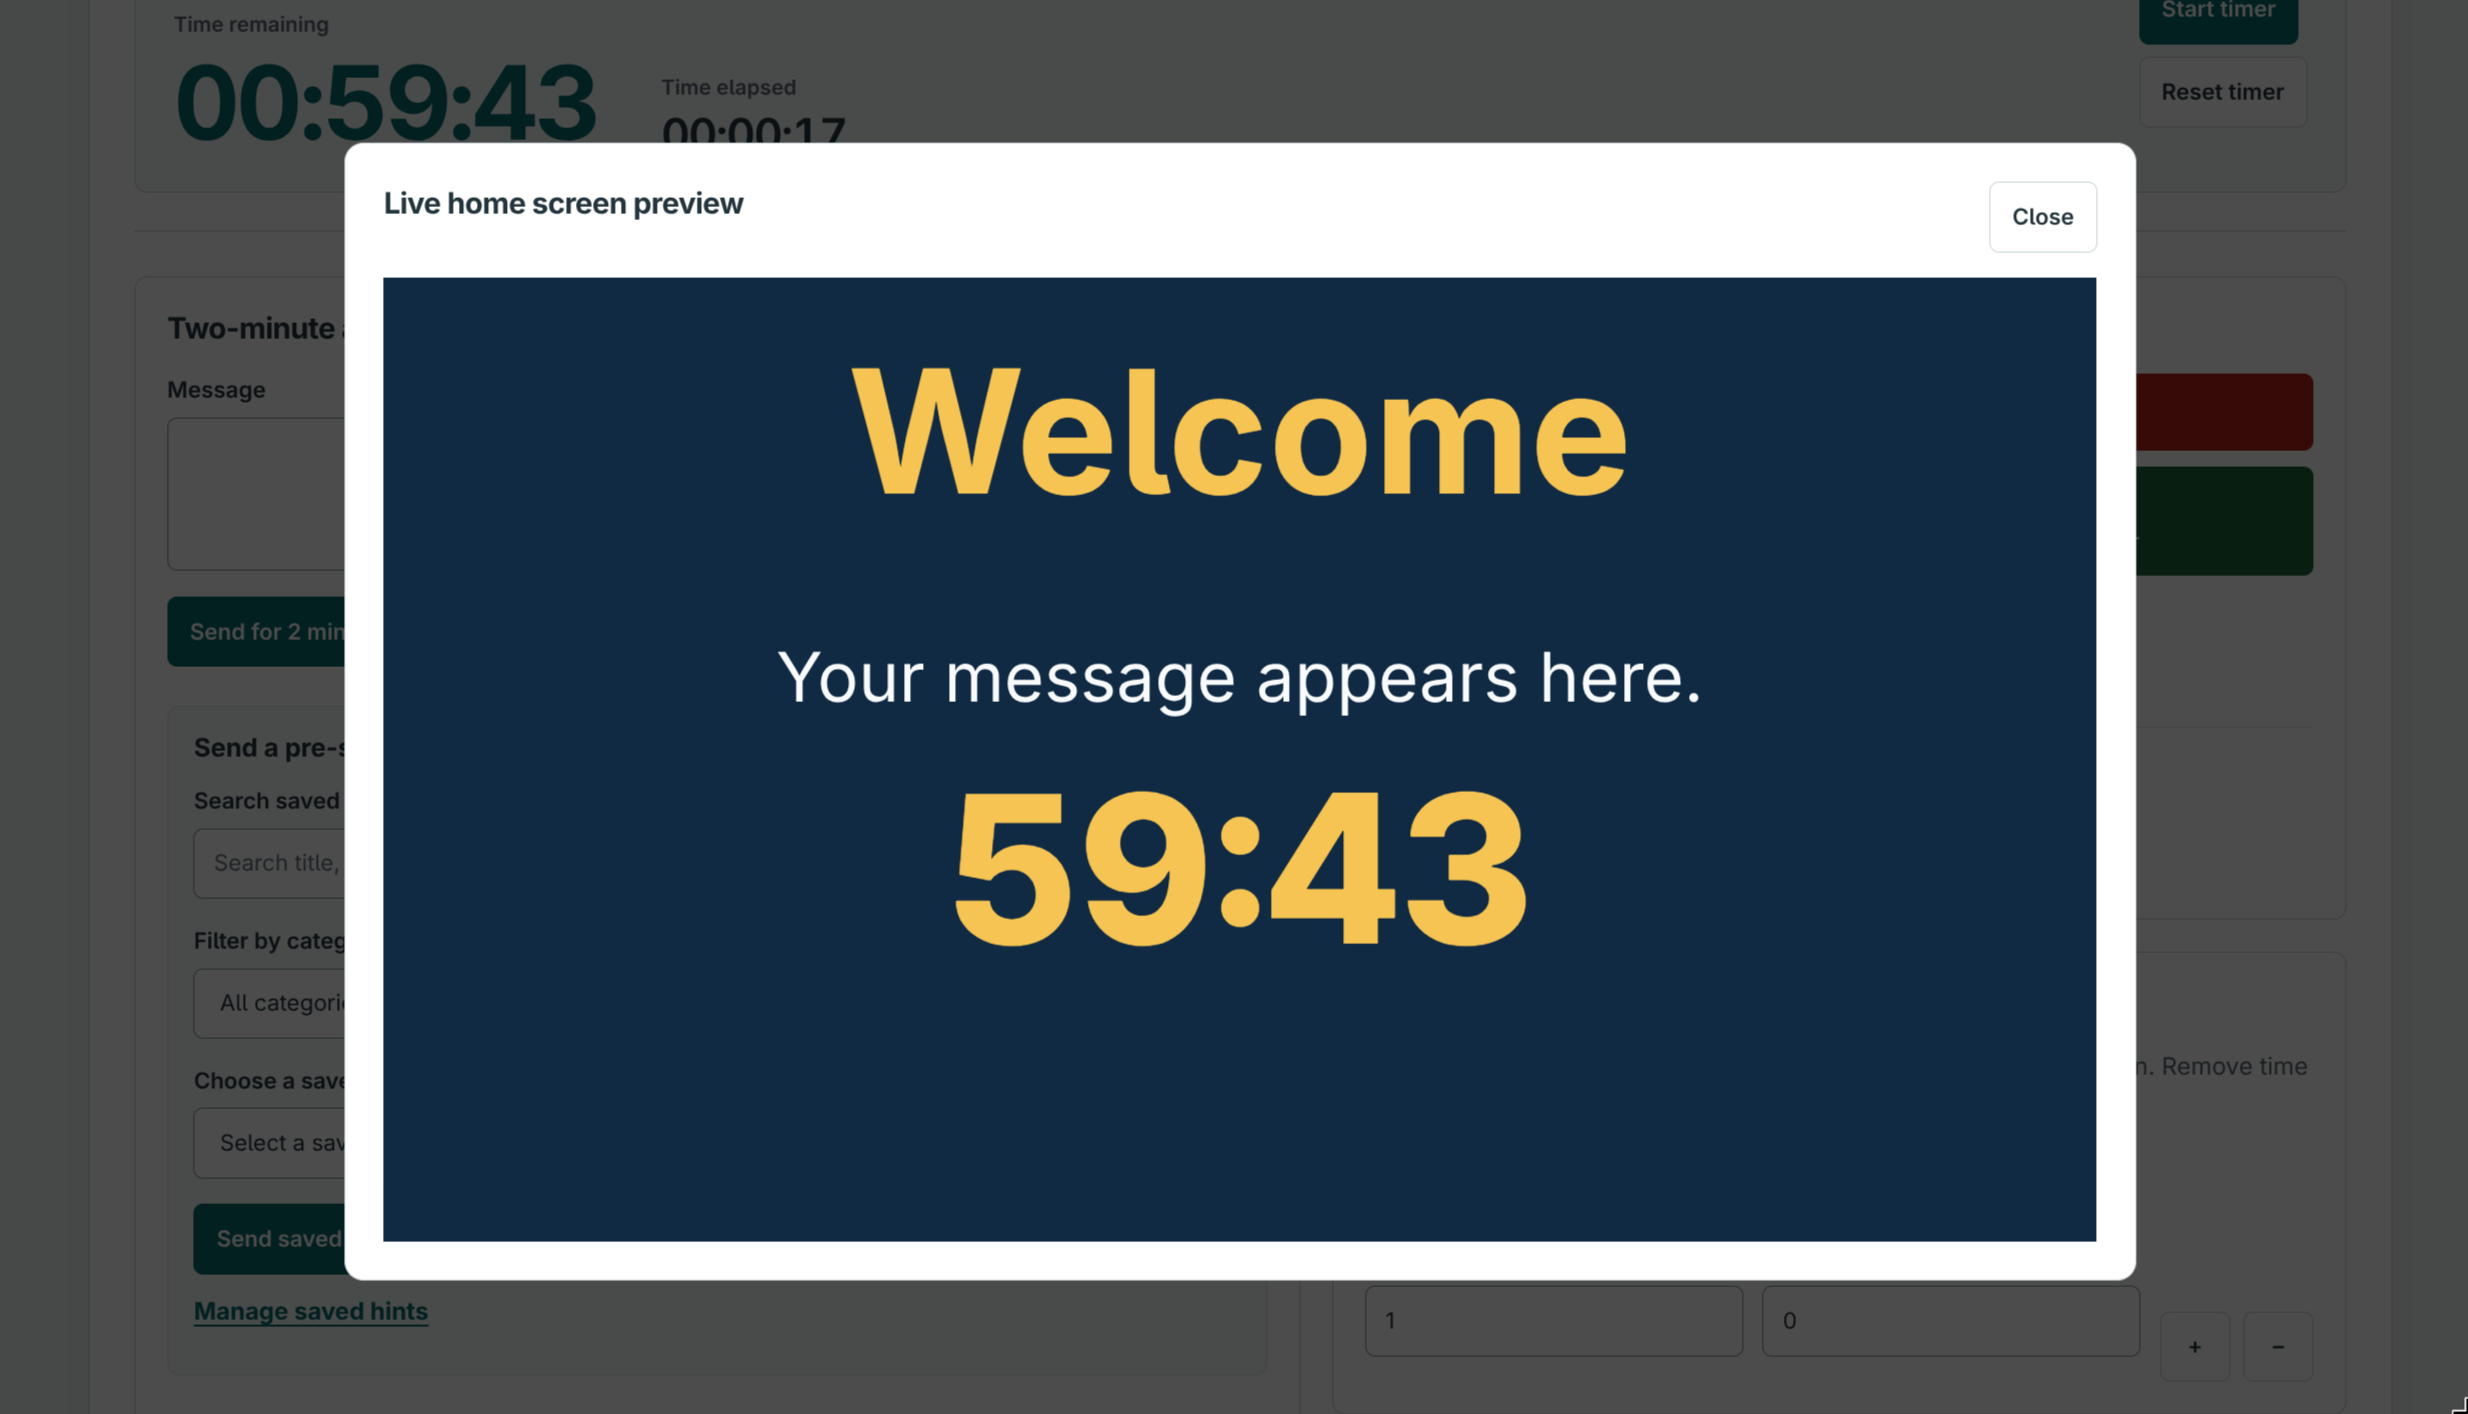
Use the installed app’s preview to check the heading, live countdown and hints after sending a clue or changing display settings. It is a view of the game screen, not a separate game session. The embedded live preview is deliberately silent; test notification, result and media audio on the main player display without preview=1 or preview=true. The screenshot here is only a static example.
A browser preview cannot confirm the room monitor’s cable, resolution, speakers or power state. Check those on the actual screen too. See the customisation guide for colours, artwork, messages and the starting timer duration.
See how each team did.
Open Leaderboard in the staff navigation to see Room statistics. The completion cards cover All time and the Last 7 days, Last 30 days and Last 365 days, showing completion percentage, completed runs and failures.
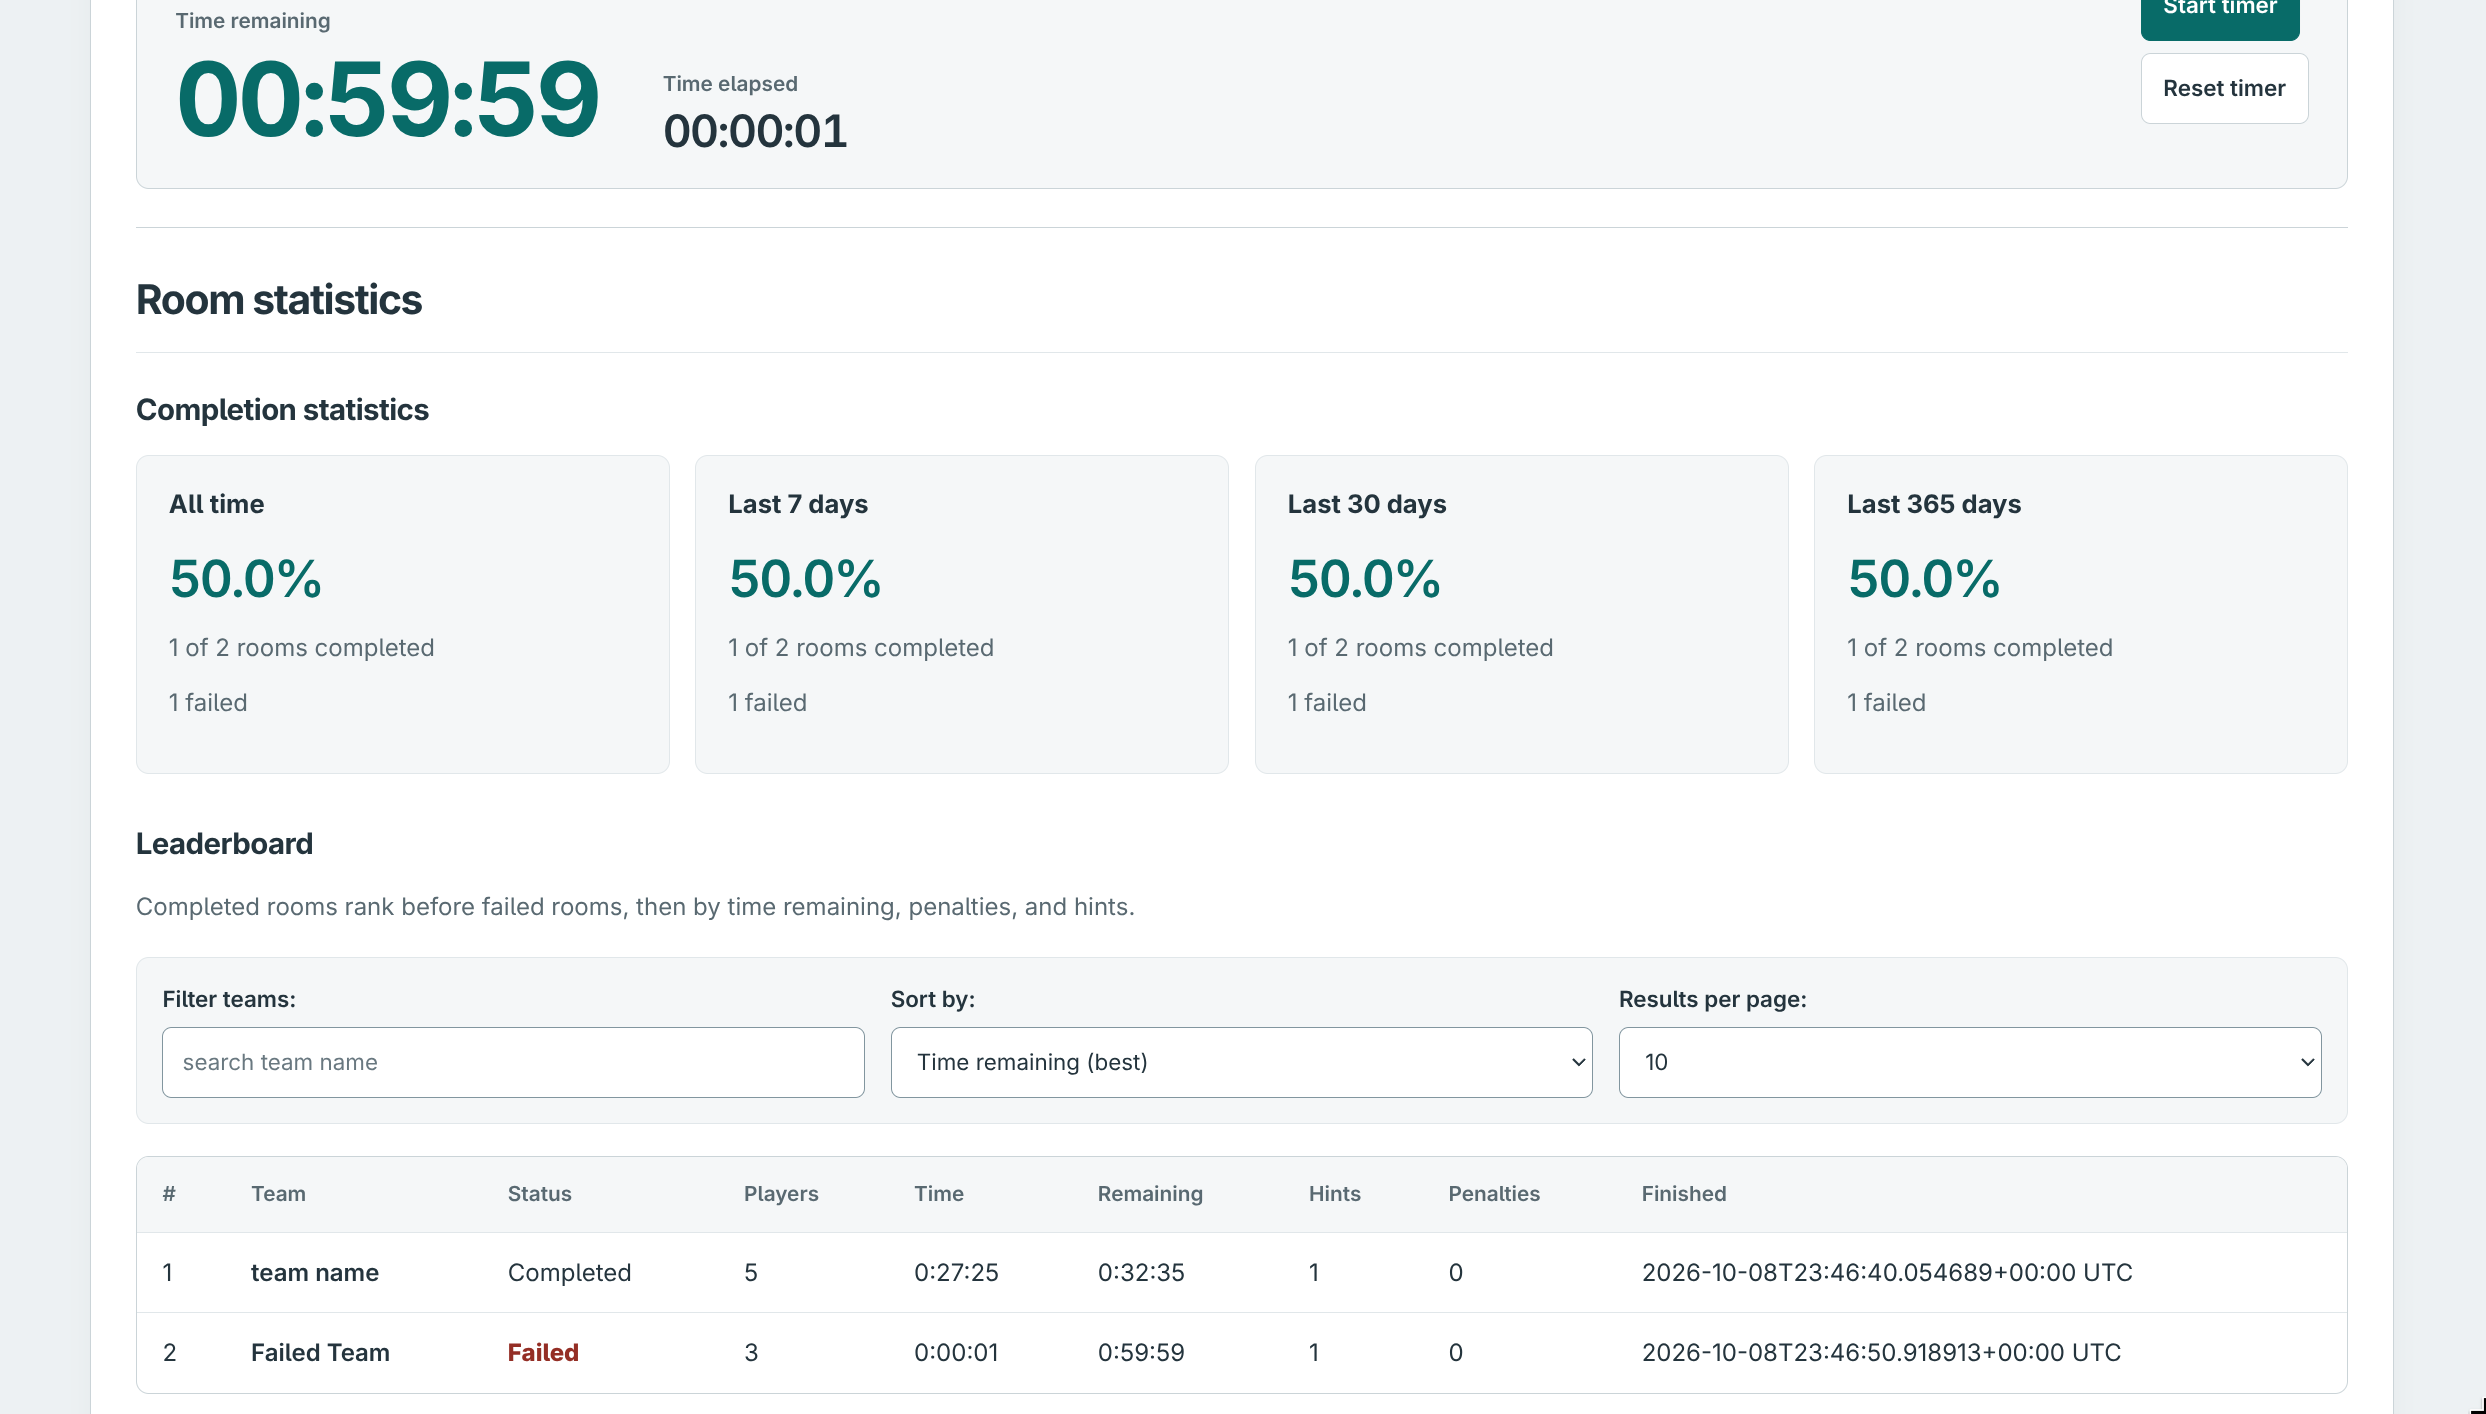
When a run ends, use the app’s result-recording flow and Save room result with the group name, group size, hints and penalties. Statistics are based on recorded results, not the current countdown shown above the table. The screenshot’s 50% rate and example teams are sample data, not a claim about every room.
Find and compare teams
Use Filter teams to search a team name, choose Sort by, and change Results per page. The table includes status, players, time taken, time remaining, hints, penalties and when the run finished.
Completed rooms rank before failed rooms, then by more time remaining, fewer penalties and fewer hints. If those are tied, the earlier recorded finish breaks the tie. A failed team with more time left does not outrank a completed team.
Review the chosen sort before comparing games. Back up src/instance/ before replacing the app checkout to preserve recorded results and uploaded media.
READY FOR ANOTHER TEAM
Finish, record, reset.
- Mark the outcome correctly and save the team’s room result.
- Reset the timer and verify the next run’s duration.
- Check the timer pause separately from the shared room-interaction / GPIO-event pause state.
- Return output interfaces and physical props to their intended ready state.
- Test hints, event sounds and the actual player display before reopening.
Keep the controls familiar.
Prepare the library before a busy session and practise the full workflow without a team in the room.
Back to install & help ↗